Mini Pumpkin Pudding Pies

It’s finally fall, and you know what that means…

Make everything pumpkin!

Here’s a quick and easy way to make mini single-serve “pumpkin pies.”  It’s just a twist on my recent post Mini-Mousse Pies.

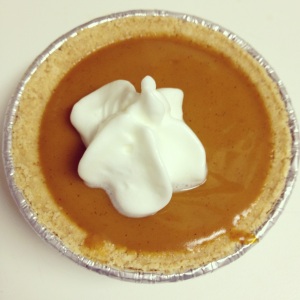
Just replace the chocolate mousse with this Jell-o Pumpkin Spice Instant Pudding.  We made the pudding as directed on the box and poured it into the mini pie crusts before refrigerating for about an hour.  Top with a bit of whipped cream if you want (obviously, delicious), and enjoy!  This is so simple, so easy, so quick, and it’s great to have a single-serving option rather than having an entire pumpkin pie tempting me.

It tasted great, though I don’t like the pudding filling as much as real pumpkin pie filling.  If there’s a way to make the pudding a bit firmer so it’s more like pie filling, I’d recommend trying that, too.  Overall, though, this dessert was a great success!

So tiny, so adorable, so delicious!

So tiny, so adorable, so delicious!

Mini-Mousse Pies

I’ve been working on being more healthy, and one of the things I’m doing is trying to make better, healthier food choices.  I don’t think it’s possible to keep up a fad diet.  But I do think it’s possible to make good choices most of the time, and to make changes that can last. It’s not easy, but getting creative can help!

That being said, sometimes, you just really want something sweet.  This weekend when we were grocery shopping, we came up with an idea that I think solves that problem without totally blowing your calories for the day.  Give these mini-mousse pies a try!

Ingredients:

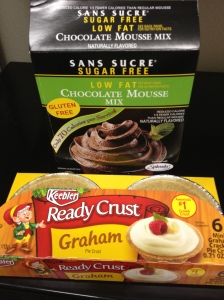
Mini-Mousse Pies Ingredients

To Make:

  1. Follow the instructions on the chocolate mousse mix box.
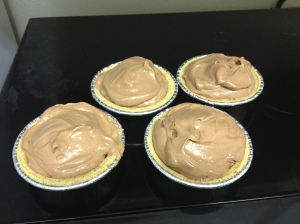
  2. Divide the mousse into four of the mini pie crusts. (I just used a big spoon!)
  3. Refrigerate for 2 hours, and enjoy!

See how easy that is?  SO easy!  You only need three ingredients and three steps!  The finished product gives you four single-serving desserts that are under 200 calories… How awesome is that?  Not only that, but if you’ve already got milk in your fridge, the other two ingredients will only cost you about $5 total. (And the mousse comes with two pouches, so it’s enough to make this dessert twice.)  Even better, you can make these however you like.  Feel like topping with some fresh fruit?  Go for it!  Maybe some chopped walnuts, coconut, mini-chocolate chips, or almond slivers… Go crazy!  You can also use different flavors of mousse or even sugar free or low fat pudding mix (though the instructions, ingredients, and nutrition information will change).  So many possibilities, so easy, and so much better for you than going to Dairy Queen!

Do you have any healthy snacks or desserts you love to make?  Please share them in the comments!  I’m always looking for new ideas!

So cute, right?

So cute, right?

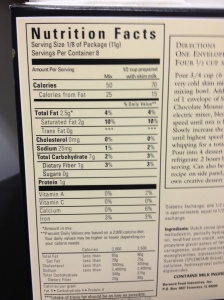
Chocolate Mousse Nutrition Facts

Chocolate Mousse Nutrition Facts

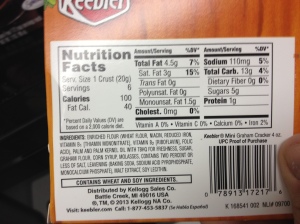
Pie Crust Nutrition Facts

Pie Crust Nutrition Facts

Fall Favorites: Apple Pie and Mini Cinnamon Rolls

One of the things that my dad loves to do for the holidays is make (semi) homemade pies.  As the years have gone on, I have slowly added a little more help to the process, and this year, I made my first one on my own!  Being far away from home can be hard.  But bringing family traditions along can really help!

So here’s the recipe that I used.  We found this recipe online and modified it a bit.  (I copied and pasted the recipe from their site and made changes for this post.)


Homesick Homemade Apple Pie

Filling Ingredients

  • 2/3 cup sugar (or more to taste)
  • 3 tablespoons all-purpose flour
  • 1 tsp. apple pie spice (you can also use a combination of cinnamon, allspice, and nutmeg to equal 1 tsp. if you don’t have apple pie spice)
  • 3 pounds of 1/4-1/2 inch thick slices of peeled and cored good cooking apples such as Granny Smith, Pippin, Golden Delicious
  • 1 teaspoon vanilla extract

Egg Wash

  • 1 large egg yolk
  • 1 Tbsp milk

Crust (Make your life easy, and just buy it.  Or don’t, and use the recipe at the link above!)

Method

1 Position rack in bottom third of oven and preheat to 375°F.

2 Combine sugar, flour and spices in large bowl. Use your hands and mix in the apples so they are well coated, then add vanilla extract.  The reason that you use your hands to mix is so that you don’t break the apples down!  This is actually pretty important.  Also, it’s kind of fun!

Mixing the apples by hand is important AND fun! (And also kind of messy!)

3 Remove crust packages from the refrigerator. Let sit at room temperature for 5-10 minutes. Unroll one of the crust disks, and sprinkle some flour on top of the disk.  Roll out a little bit with a rolling pin on a lightly floured surface to a 12 inch circle; about 1/8 of an inch thick (you really only have to make sure that the disk from the refrigerator is rolled flat and even, which isn’t always the case when you unroll it from the package).  As you roll out the dough, use a metal spatula to check if the dough is sticking to the surface below.  Add a few sprinkles of flour if necessary to keep the dough from sticking.  Gently fold in half. Place on to a 9-inch pie plate, lining up the fold with the center of the pan.  Gently unfold and press down to line the pie dish with the dough.

4 Spoon in apple filling, mounding slightly in center.  I also recommend setting a little of the filling aside and leaving it in the refrigerator for a little while.  It’s DELICIOUS.
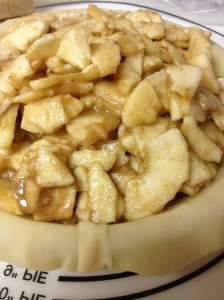

5 Roll out second disk of dough, as before. Use a cookie cutter or knife to cut a fun shape out of the center of the dough, or you can later cut slits in the top to allow the pie to vent as it cooks.  I used a knife to cut a star, but you can do whatever you want!  Gently turn over onto the top of the apples in the pie. Pinch top and bottom of dough rounds firmly together. Trim excess dough with kitchen shears, leaving a 3/4 inch overhang.  Set the excess aside. Fold dough under itself so that the edge of the fold is flush with the edge of the pan. Flute edges using thumb and forefinger or press with a fork.

I used a knife to cut a star out of the middle 🙂

pressing the top crust and bottom crust together
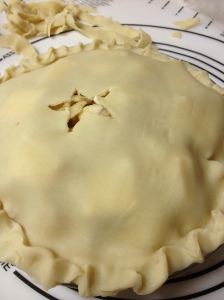
 

Okay, so I’m not very good at the “fluting the edges” part. It may not be very pretty, but it still tastes good, I promise!


6 Stir yolk and milk in small bowl to blend. Brush over top of pie. Cut slits in top crust to allow steam to escape if you didn’t cut a shape earlier. Bake pie until crust begins to turn golden, about 20 minutes, then reduce heat to 350°F.  Tent the rims with aluminum foil or a pie protector if the edges are browning too quickly (they will, so make sure you do this!).  Bake until crust is golden and juices are bubbling, anywhere from an additional 30 to 45 minutes, depending on the type of apples you are using.   -OR- cover the edges with foil to protect them from burning until the last 5-7 minutes of cooking.  The directions on the website are the first option, the second one is the one my dad and I use.


I sprinkled a little bit of sugar on top after brushing on the egg wash. I don’t know, my dad always did it, so I did, too!


Use strips of foil to cover the edges so they don’t burn

7  Transfer to rack; let stand 1 hour. Serve pie warm, cold, or at room temperature.

I wish you could have smelled this! Fresh apple pie smells so good!


YUM.


Okay, so remember the excess crust that you cut off?  You know, the part I told you to set aside?  I hope you listened, because I’m about to tell you something simple and delicious to do with it!

Mini Cinnamon Rolls

1.  Roll the excess crust into a ball.

2.  Use a rolling pin and a sprinkle of flour to roll the crust flat into a rectangular shape.  If it’s not perfect, it’s no problem!

3.  Spread a little butter over the top of the rolled out crust.

4.  Sprinkle a generous layer of cinnamon-sugar on top of the butter.

5. Sstarting at one end, roll the crust into a pinwheel.
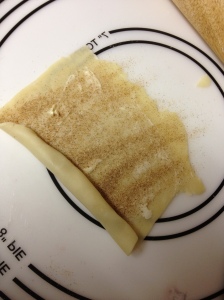
6.  Slice into mini cinnamon rolls.
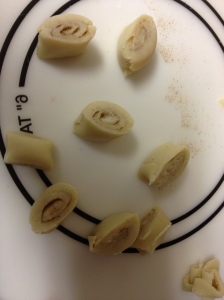
7.  Place on a cookie sheet, spread out, and bake for about the last 10-12 minutes that your pie is in the oven.  (Look!  Multitasking on so many levels!)

8.  Remove from the oven, cool, and enjoy!
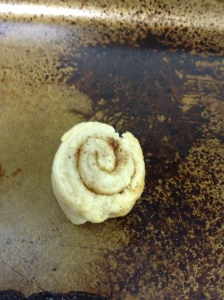
All done! You can bake them a little longer if you like them more golden-brown, but be careful because the sugar will scorch to the cookie sheet if you leave them too long!


So there you have it!  Homemade apple pie and mini cinnamon rolls, all in one fell swoop!  This was a really fun project for me because it gave me a good reason to keep in touch with my dad, and he was really happy to be able to help.  Baking is something that we have always both enjoyed, so it is fun to be able to bond over it, even if we’re on opposite sides of the country.  Also… the pie was DELICIOUS.  Like… really yummy.  AND the house smelled amazing for days!  I call that a success!


What are some of your favorite family fall traditions?  Please share them in the comments!

Friday Favorites

After comlpeting my first final of the semester, I’m happy to be thinking about something more fun!  Soon, I will have successfully completed my 1L year… I can’t wait!

Epic Study Fort! It may not be very practical, but it was sure fun and made studying suck less!

Favorite confidence booster: I have always been very shy and had difficulty in social situations. This was such a great feeling, and I totally kicked social anxiety's ass!

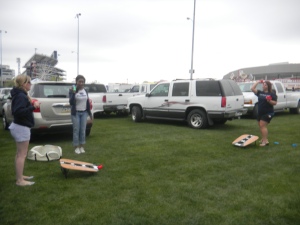
Favorite tailgate game: Corn Hole! You don't have to be sober or drunk to play this one, and its tons of fun! - ALSO, totally in love with Noelle's seersucker shorts!

Speaking of seersucker... I LOVE just about anything seersucker! Click the photo to take you to an awesome blog post about it!

Favorite purchase this week: This Ann Taylor Loft tank! They were on sale for $15 and came in all sorts of adorable summery colors, but I fell head over heels for this amazing teal color. It's even more vibrant in person! I also found my favorite sweater in white and managed to get this tank and the cardigan for less than $30... Love me a Loft sale!

I made s'more of these s'more treats for the Blue and White tailgate last weekend! This time, I made three varieties: the original, some with peanutbutter added, and some with nutella instead of chocolate. (The ones in this picture are with peanutbutter!) Let me tell you, they were ALL delicious and were all a huge hit! I also really loved these pink and white sprinkles, via my most recent care package from my awesome mom!

I hope you enjoyed this week’s edition of Friday Favorites!  Please leave a comment if there’s anything you’d like to see in the next post!

XOXO

Bunny Cake

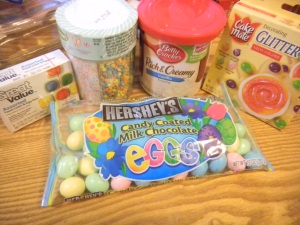
Since I was little, my mom has made a Bunny Cake for Easter most years.  A couple of years ago, she taught me how to make it.  This year, I couldn’t be home with my family for Easter.  My law school family, though, celebrated together.  It was fantastic!  We had a potluck dinner, and when they asked me what I’d like to bring, this was the first thing that came to mind.  I was so excited to share a tradition with others, especially when it meant bringing a part of home with me!

What you need:

  1. cake mix – I used Funfetti, but you can use whatever you want!
  2. frosting – it works best with plain vanilla
  3. coconut
  4. food coloring
  5. sprinkles
  6. candy for the eyes and nose
  7. either candy or colored frosting for the mouth and whiskers
  8. a really big flat pan or board to build the cake on – I recommend measuring first!

Here are some pictures of the process… I hope you enjoy!


Two round cakes. Use one for the face, and cut the other into the ears and the bowtie.

This is what it looks like laid out

We decided on yellow for the bowtie!

Here it is after the frosting!

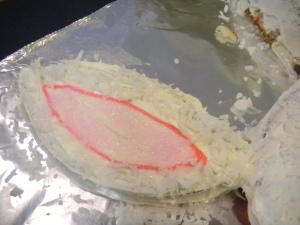
Ear: pink icing, pink sprinkles, and coconut

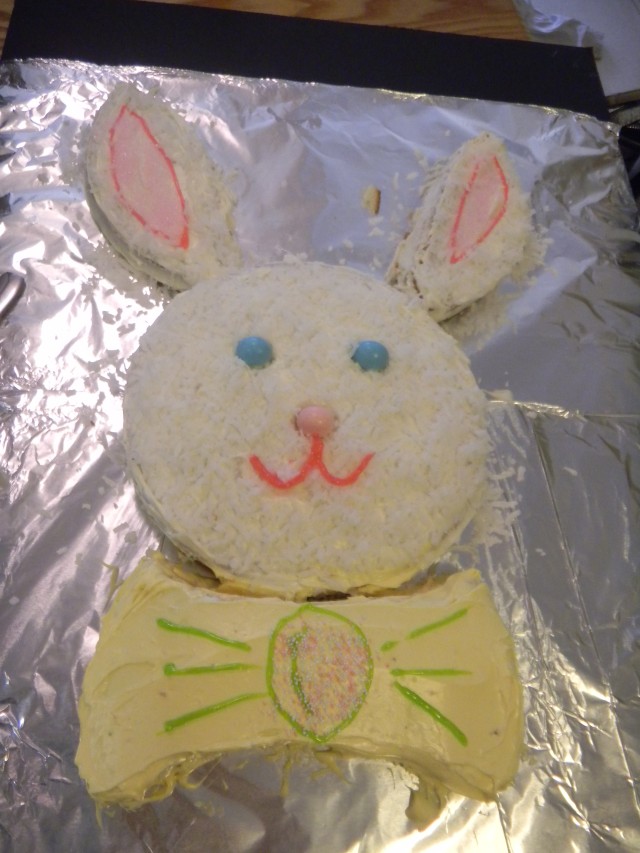
Here he is! ❤


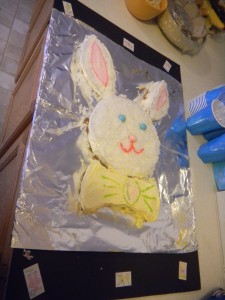
We didn't have a pan or cutting board large enough, so we used the very thick kind of posterboard. I had some extra Easter stickers, so I used them to decorate the borders. I think it worked!

Sugar Cookies

A Part of the “Getting in the Christmas Spirit” Series


This year, we had quite a busy holiday season, and I was only at home for about two and a half weeks total.  Since we basically just ran out of time, we took a bit of a short cut in cookie baking.  Instead of going through the trouble of making cookies from scratch, we bought the pre-made sugar cookie dough, baked them, and then decorated!  Then you still get the personal touch of the fun decorating, but you don’t have as much time or clean up!


having a cooling rack is a must!


Easy decorating!


Snowflake cookie! Used sparkly blue gel icing

Yum, sprinkles! I also added clear sugar crystals to the white frosting snowflakes for a little something extra!

Yum!


What are some of your favorite “easy” Christmas cookies?

Drink Hot Chocolate

A Part of the “Getting in the Christmas Spirit” Series

Keurig Dark Hot Choclate K-Cup, Coffee Mate Peppermint Mocha, Reddi Whip, chocolate sprinkes, and Peppermint sprinkles!

One of the best parts about winter is cuddling up with a blanket and slipper socks, warming up with a hot cup of cocoa!  I have turned hot chocolate into a bit of an art, trying different combinations and flavors to make the tradition even more fun!  There is pretty much no end to what you can do with hot chocolate, and you don’t have to make it complicated!  Here are some of my favorite suggestions:

For the hot chocolate:

The easiest way is to just use the little packets you buy at the store!  Many brands are delicious, so pick what you like.  A few things to consider here:

  • If you’re trying to be health-conscious… well take a look at the nutrition facts carefully.  Many of the low fat, lite, low sugar, etc. options aren’t actually that helpful.  I took a close look and realized that the way they often make the grams and percentages lower is that there’s LESS of the MIX in each packet.  So it’s not really helping that much, you’re just getting a more watered-down version of the regular stuff.
  • For the best flavor and taste, one packet isn’t enough!  Most coffee mugs these days are much larger than they were back in the day.  For a “normal” size mug, use 1 1/2 packets.  For one of the large Starbucks style ones, you may need two.
  • You can make great hot chocolate out of packets, even with water!  Just add a little milk at the end for the creaminess.  This helps keep it lighter than if you used all milk, but you still get the benefit of the creaminess.  I probably use only about 1/8 cup milk in mine.
  • If you have one of the single-serving coffee makers (like Keurig, Tassimo, or the like) they probably have products available for hot chocolate, too.  It works great, but make sure you don’t use too much water when you make it!

You can also make hot chocolate from scratch, which is absolutely delightful.  It does take a lot more time and effort, though, so be prepared.  It’s definitely better than the stuff out of a pouch or a can, so it can really be wirth the extra trouble!  Then again, the packets can be great, too, so don’t feel you NEED to go home-made!

Flavor options:

There are lots of ways to achieve different flavors.  You can start with flavored packets, add flavor syrup, or even use flavored coffee mate in place of the little bit of milk!  Here are some of my faves…

  • Peppermint Cocoa: I love peppermint mocha, so removing the coffee from the mix is noooo problem!  Make cocoa the normal way, then add a bit of Coffee Mate Peppermint Mocha to taste!
  • Mexican Hot Chocolate:  I used a cookbook recipe to make this from scratch, and it is delish!  You can find tons of recipes online, but the cinnamon adds just a little bite and an extra bit of warmth!
  • Cocoa Classics:  Land-O-Lakes makes a variety of flavored hot cocoas in packets (for these, you don’t need to do the 1 1/2 or 2 usually!) that are awesome!  It seems they no longer sell my favorite (it had graham cracker flavor!) but there are tons of other great options.  You can find them in most grocery stores, and they sell them individually so you can try different flavors!  Even if you don’t want to buy them, they can serve as good inspiration for flavor ideas!
  • White Chocolate:  Some brands offer a white chocolate option, which can be delicious on its own or in combination with any of the other flavors!

Toppings and extras:

There are different options for toppings… you can go with or without, but I think it’s more fun with! 🙂

  • Cool Whip:  I guess a lot of people like Cool Whip as a topping, but I’ve never been much of a fan.  Oh well, it’s still out there and you can use it if you like it!
  • Whipped cream:  Ahhh, my favorite!  I prefer Reddi-Whip, but that’s just a personal preference.  Even their fat free is really good, and it doesn’t add much in the way of calories (unlike if you order at Starbucks) because it has so much air!  They even offer chocolate whipped cream, if you wanna go that route!
  • Sprinkles:  YUM YUM!  Sprinkles of any kind make hot chocolate more fun.  You can use holiday colors, sprinkles shaped like stuff, chocolate ones, or even flavored sprinke crystals.  One of my holiday favorites is the peppermint ones, but you can use any flavor you like that matches with the flavors you’ve already chosen.  You can also use chocolate shaving style sprinkles, though I never have them on hand.  One of my all-time favorites is the Pampered Chef Sweet Cinnamon Sprinkle.  SOOO GOOD!
  • Syrup:  You can also drizzle some of your favorite flavored syrups on top… caramel, chocolate, strawberry… whatever you have and like!
  • Hot Chocolate Surprise:  You can also do a Hot Chocolate Surprise, where you hide something at the bottom of the cup!  You can try different things (as long as they don’t get soggy), but my favorite is a Hershey’s kiss!
  • Stirrers:  I’ve seen a lot of cute stirring options online, but I haven’t really used many myself.  You can buy pre-made stirrers, or you can make them yourself using candy canes, peppermint sticks, or stirring spoons, like these!

I hope you enjoy these ideas, and please do share your own favorites!

Chocolate Christmas Cookies

A Part of the “Getting in the Christmas Spirit” Series

One of my very favorite holiday traditions is baking Christmas cookies!  Every year, my family bakes dozens of cookies.  Sometimes we give them to neighbors as gifts, sometimes we take them with us to potluck holiday parties, and sometimes we just enjoy them at home.   My fiance and I have extended the tradition and decorated sugar cookies last year together, but I will save that for another post. 🙂


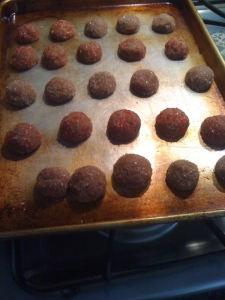
Last year I tried an old recipe for the first time on my own.  The cookies turned out great!  They were delicious and not all that difficult to make.  I admit that they were time-consuming and didn’t make a whole lot in a batch.  But, they are totally worth it!  I did half the batch as chocolate “snowballs” rolled in peppermint sprinkles and half as “thumbprint” cookies with maraschino cherries in the middle.  For the cherry ones, I also spooned a bit of the cherry syrup/juice into the indent around the cherry to add a little extra flavor.  I can’t wait to make these again once I’m home and have a decent kitchen!


Thumbprint version with maraschino cherries.


Chocolate "snowballs" rolled in peppermint sprinkles


You can find the recipe I used online at this link.  We had it from an old magazine that we had ripped the page out of years ago, so I’m glad I can find it online, too!  The best part about it is that you can make a lot of different shapes and variations with the same recipe because the dough holds its shape once baked.  The link provides a few options, but I loved the ones I made.  Once you make the dough, you can pretty much do whatever sounds good to you!


PLEASE feel free to share any of your favorite cookie recipes!  You can never have too many Christmas cookie recipes, and I am more than willing to try any new ones you recommend!  Hope you enjoy!

Peppermint Bark Brownies

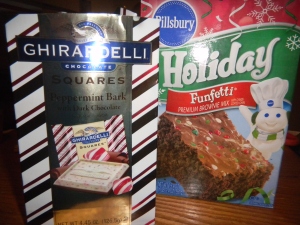
This is a new twist on an old favorite, my To-Die-For Toffee Brownies.  I substituted peppermint bark for the toffee and used Funfetti brownies because… well, let’s face it, Funfetti makes everything better!  DE-LISH!

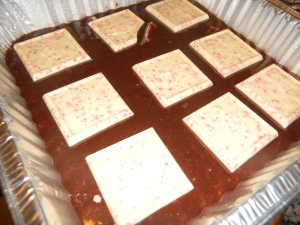
Although I used the Girahdelli squares in the photo above, I don’t think that was the best idea.  I would recommend using the Peppermint Bark Bars instead.  I used milk chocolate, but I think the dark chocolate would be good, too.  Like the toffee bars from my previous recipe, two of these should cover the 8×8 pan pretty well.  I wasn’t able to find them at the store today, but i will definitely make sure I use them next time because there weren’t enough of the squares in the bag to fully cover the pan (and it’s just not as easy!)

Steps:
  1. Preheat the oven according to the brownie mix directions and prepare an 8×8 baking pan (I usually use cooking spray, but you can grease it the old fashioned way if you really want)
  2. Mix the brownie mix according to the directions on the box. I used the Funfetti mix in the photo above instead of the Betty Crocker Supreme Brownie mix with the Hershey’s syrup because I wanted something a little festive.  They turned out great!  The brownies were moist and fluffy, much less dense than the Supreme mix I’ve used before.
  3. Spread half of the brownie mix into the pan. If it’s not exact, don’t worry, but make sure there is enough to completely cover the bottom of the pan with enough left over for another full layer.
  4. Open the two Peppermint Bark bars and place them as a layer on top of the bottom layer of brownie mix. If you use an 8×8 pan, they will fit perfectly! If you use another pan, you’ll have to do some breaking and puzzle work, but it’s still do-able.
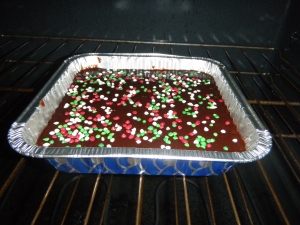
  5. Spread the rest of the brownie mix on top.
  6. Bake according to the box directions but subtract two-three minutes from the bake time (I believe it comes out to 42 mins. instead of 45).
  7. Cool, cut, and enjoy!

Even though the peppermint bark holds its shape when cooled, the peppermint flavor is fantastic.  It’s not overwhelming, but not too subtle, either.   I really enjoyed this new recipe.  It was fun to try something new, and it’s even better when it turns out well!

I think this is a great holiday recipe, and I hope you enjoy!