Family Favorite Recipe: Pink Applesauce

Two words: comfort food.

My grandmother used to make this for family dinners when I was very young, and my mom made it occasionally growing up after we moved away.  Now, my generation, my cousins and I, make this for family gatherings and for fun.  When I just need something deliciously comforting, this is the best easy thing to make.

The best part is that you can make it the easy way or the REALLY easy way.  For the really easy way, just use all store-bought applesauce and skip all the steps before adding the “secret ingredient!”

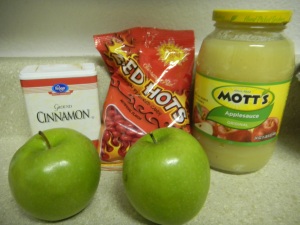
What you need:

  1. 2-3 Apples (whatever kind you like best)
  2. 1 jar of store-bought plain applesauce
  3. cinnamon
  4. sugar
  5. 1 package of red hot candies
  6. water
This is all you need!

This is all you need!

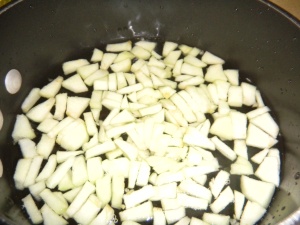
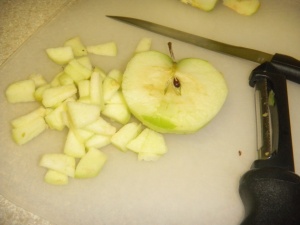
Peel the apples and cut them into small pieces.  Dump them into your pot with cold water to keep them from turning brown while you work.

Peel the apples and cut them into small pieces. Dump them into your pot with cold water to keep them from turning brown while you work.


pink applesauce


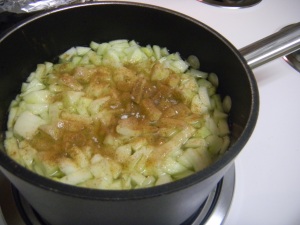
Boil and simmer the apples in the water until they are very soft.  Add cinnamon to the mixture and let simmer another couple of minutes to let the apples soak up the flavor.

Boil and simmer the apples in the water until they are very soft. Add cinnamon to the mixture and let simmer another couple of minutes to let the apples soak up the flavor.


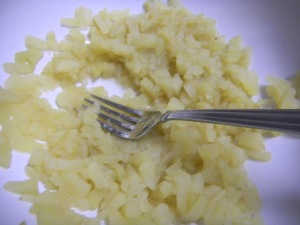
Drain the water and smash the apples with a fork.  I took them out of the pot I was using so I didn't scratch it with the fork, but you don't have to if you're not using nonstick.

Drain the water and smash the apples with a fork. I took them out of the pot I was using so I didn’t scratch it with the fork, but you don’t have to if you’re not using nonstick.


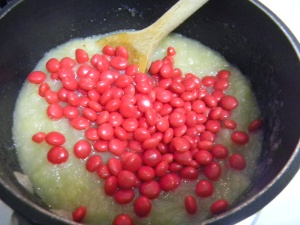
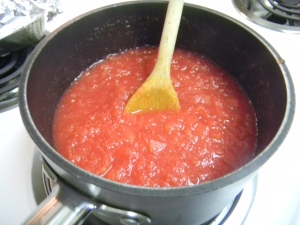
Mix the smashed apples, the jar of applesauce, and the entire package of red hots.  Simmer on low, stirring frequently, until all of the red hots are completely melted and incorporated.

Mix the smashed apples, the jar of applesauce, and the entire package of red hots. Simmer on low, stirring frequently, until all of the red hots are completely melted and incorporated.


Add a little sugar at a time, to taste.  You may not need to add any at all, it just depends on the apples you used and the kind of applesauce.  Stir, and viola!  Chill in the refrigerator until it's cold, and it's ready to serve!

Add a little sugar at a time, to taste. You may not need to add any at all, it just depends on the apples you used and the kind of applesauce. Stir, and viola! Chill in the refrigerator until it’s cold, and it’s ready to serve!


This cinnamon flavored applesauce is absolutely one of my favorite things in the entire world.  I hope you enjoy, too!  Please feel free to comment with your favorite family recipes!


Fall Favorites: Apple Pie and Mini Cinnamon Rolls

One of the things that my dad loves to do for the holidays is make (semi) homemade pies.  As the years have gone on, I have slowly added a little more help to the process, and this year, I made my first one on my own!  Being far away from home can be hard.  But bringing family traditions along can really help!

So here’s the recipe that I used.  We found this recipe online and modified it a bit.  (I copied and pasted the recipe from their site and made changes for this post.)


Homesick Homemade Apple Pie

Filling Ingredients

  • 2/3 cup sugar (or more to taste)
  • 3 tablespoons all-purpose flour
  • 1 tsp. apple pie spice (you can also use a combination of cinnamon, allspice, and nutmeg to equal 1 tsp. if you don’t have apple pie spice)
  • 3 pounds of 1/4-1/2 inch thick slices of peeled and cored good cooking apples such as Granny Smith, Pippin, Golden Delicious
  • 1 teaspoon vanilla extract

Egg Wash

  • 1 large egg yolk
  • 1 Tbsp milk

Crust (Make your life easy, and just buy it.  Or don’t, and use the recipe at the link above!)

Method

1 Position rack in bottom third of oven and preheat to 375°F.

2 Combine sugar, flour and spices in large bowl. Use your hands and mix in the apples so they are well coated, then add vanilla extract.  The reason that you use your hands to mix is so that you don’t break the apples down!  This is actually pretty important.  Also, it’s kind of fun!

Mixing the apples by hand is important AND fun! (And also kind of messy!)

3 Remove crust packages from the refrigerator. Let sit at room temperature for 5-10 minutes. Unroll one of the crust disks, and sprinkle some flour on top of the disk.  Roll out a little bit with a rolling pin on a lightly floured surface to a 12 inch circle; about 1/8 of an inch thick (you really only have to make sure that the disk from the refrigerator is rolled flat and even, which isn’t always the case when you unroll it from the package).  As you roll out the dough, use a metal spatula to check if the dough is sticking to the surface below.  Add a few sprinkles of flour if necessary to keep the dough from sticking.  Gently fold in half. Place on to a 9-inch pie plate, lining up the fold with the center of the pan.  Gently unfold and press down to line the pie dish with the dough.

4 Spoon in apple filling, mounding slightly in center.  I also recommend setting a little of the filling aside and leaving it in the refrigerator for a little while.  It’s DELICIOUS.
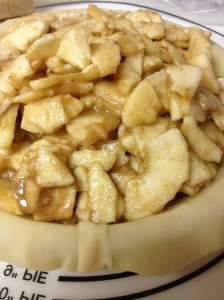

5 Roll out second disk of dough, as before. Use a cookie cutter or knife to cut a fun shape out of the center of the dough, or you can later cut slits in the top to allow the pie to vent as it cooks.  I used a knife to cut a star, but you can do whatever you want!  Gently turn over onto the top of the apples in the pie. Pinch top and bottom of dough rounds firmly together. Trim excess dough with kitchen shears, leaving a 3/4 inch overhang.  Set the excess aside. Fold dough under itself so that the edge of the fold is flush with the edge of the pan. Flute edges using thumb and forefinger or press with a fork.

I used a knife to cut a star out of the middle 🙂

pressing the top crust and bottom crust together
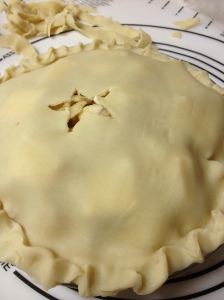
 

Okay, so I’m not very good at the “fluting the edges” part. It may not be very pretty, but it still tastes good, I promise!


6 Stir yolk and milk in small bowl to blend. Brush over top of pie. Cut slits in top crust to allow steam to escape if you didn’t cut a shape earlier. Bake pie until crust begins to turn golden, about 20 minutes, then reduce heat to 350°F.  Tent the rims with aluminum foil or a pie protector if the edges are browning too quickly (they will, so make sure you do this!).  Bake until crust is golden and juices are bubbling, anywhere from an additional 30 to 45 minutes, depending on the type of apples you are using.   -OR- cover the edges with foil to protect them from burning until the last 5-7 minutes of cooking.  The directions on the website are the first option, the second one is the one my dad and I use.


I sprinkled a little bit of sugar on top after brushing on the egg wash. I don’t know, my dad always did it, so I did, too!


Use strips of foil to cover the edges so they don’t burn

7  Transfer to rack; let stand 1 hour. Serve pie warm, cold, or at room temperature.

I wish you could have smelled this! Fresh apple pie smells so good!


YUM.


Okay, so remember the excess crust that you cut off?  You know, the part I told you to set aside?  I hope you listened, because I’m about to tell you something simple and delicious to do with it!

Mini Cinnamon Rolls

1.  Roll the excess crust into a ball.

2.  Use a rolling pin and a sprinkle of flour to roll the crust flat into a rectangular shape.  If it’s not perfect, it’s no problem!

3.  Spread a little butter over the top of the rolled out crust.

4.  Sprinkle a generous layer of cinnamon-sugar on top of the butter.

5. Sstarting at one end, roll the crust into a pinwheel.
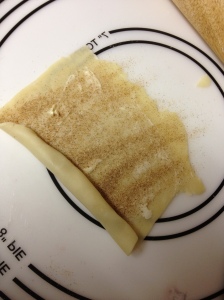
6.  Slice into mini cinnamon rolls.
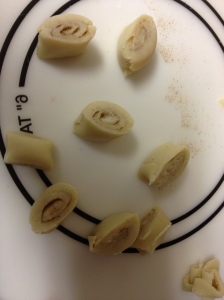
7.  Place on a cookie sheet, spread out, and bake for about the last 10-12 minutes that your pie is in the oven.  (Look!  Multitasking on so many levels!)

8.  Remove from the oven, cool, and enjoy!
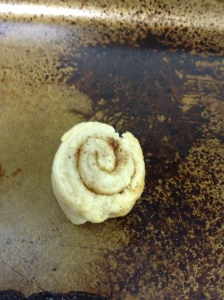
All done! You can bake them a little longer if you like them more golden-brown, but be careful because the sugar will scorch to the cookie sheet if you leave them too long!


So there you have it!  Homemade apple pie and mini cinnamon rolls, all in one fell swoop!  This was a really fun project for me because it gave me a good reason to keep in touch with my dad, and he was really happy to be able to help.  Baking is something that we have always both enjoyed, so it is fun to be able to bond over it, even if we’re on opposite sides of the country.  Also… the pie was DELICIOUS.  Like… really yummy.  AND the house smelled amazing for days!  I call that a success!


What are some of your favorite family fall traditions?  Please share them in the comments!
Kittehs

Hello loves!

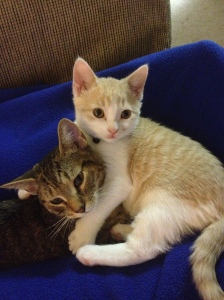
I haven’t been posting much lately, in part because I have been busy taking care of the two new additions to my little family!

Introducing…

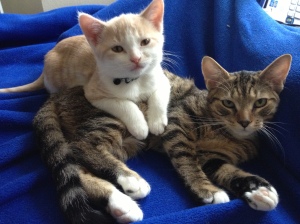
Chairman Chester Meow… We call him Chester for short

and…

Bella

To be honest with you, adopting these wonderful balls of love was one of the best decisions my fiance and I have ever made!  We brought them home on 10/5/12.  They bring joy to our lives every single day.  Watching them play and seeing them grow and learn is so fulfilling.  I can’t even explain how happy they make us!

I would like to sincerely thank Centre County Paws for all of the work that they do.  Without their hard work and dedication, we would never have found our new kittens, and they would have never found a loving home.  While I can understand the appeal of choosing a new pet from a breeder or pet shop, I would highly recommend adopting them from a local shelter, like we did!  There is no way that I could love these little furballs any more than I do.  There are tons of benefits that come along with adopting pets.  For example, you get a great feeling knowing that you are rescuing an animal that someone else left behind.  In addition, it is much less expensive to adopt than to buy a new pet.  Adoption fees are usually reasonable, and you know that the money is going to a great cause.  I would recommend getting to know the animal before choosing to bring it home to make sure that it fits your needs and abilities to care for it, but if you’re patient you can find the perfect pet!

Please keep in mind that, while having pets is absolutely fantastic, it is also a lot of responsibility.  Different types of animals require different levels of attention, and all pets deserve to have a family that takes good care of them.  It’s about more than just feeding them and making sure they have fresh water (which, of course, are both important aspects of pet ownership).  You also have to make sure they are healthy, keep up with vet visits and immunizations, make sure they have comfortable places to sleep, make sure that they feel safe and loved… there’s a lot that goes into pet ownership!

With all of the stress and difficulties that law school and life bring, it is so wonderful to come home every day knowing that these two are waiting for us.  Cuddling up with them at the end of a long day really just makes life a lot better!

If you have any questions about having new pets or about adopting, please let me know in the comments, and I would be happy to answer whatever I can!

____________________________

Update: 12/7/12

It’s been a couple of months, and Bella and Chester continue to bring us joy every single day!  In fact, they are both currently warming my feet as I type. 🙂

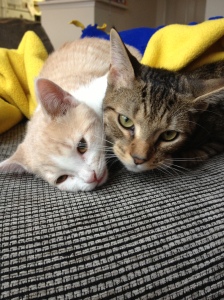
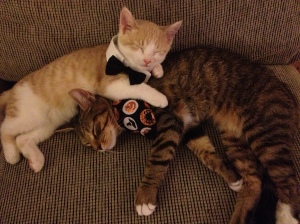
At first, we were a little concerned that the two wouldn’t get along.  It took a couple of weeks for them to get used to each other (they came from different litters), but now they are BEST friends.  It is so sweet how much they cuddle and play together.  They even groom each other!  Chester follows Bella just about everywhere that she goes… unless he’s just too sleepy. hehe.  I am so glad that we decided to choose two kittens to become part of our family.  It is clear every day how much they love and need each other, especially considering that we are in class and at school for at least a few hours per day, so it’s nice to know they have each other.  Plus, they have very distinct personalities and each bring different things to our lives.  Chester is the snuggler and the gentleman, always posing and looking proper.  Bella is always prancing around like the princess that she is, but she’s also quite the little huntress and loves pouncing on her toys… especially that darned red dot!

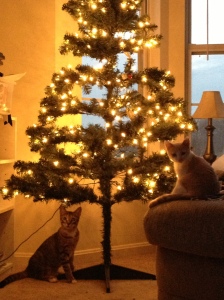
Here are some updated pictures!

IMG_5069

IMG_5260

IMG_5391

IMG_5701

IMG_6045

Wedding Planning: A New Journey

Hello all!

I am in the process of attempting to plan my wedding to my fantastic fiance.  I have trouble deciding what to have for lunch most days, so I am pretty much terrified at the prospect of planning such a huge event!  At this point, I am in the beginning stages of planning.  I am hoping that chronicling my journey here will help me organize my thoughts and maybe help someone else who feels as overwhelmed as I do, and I welcome any (positive and constructive) suggestions you may have!

Last week, I made a few forward steps to get started!

1.  I went to Barnes and Noble and picked up these to help myself get motivated and organized!  I picked this organizer because it has an actual 3-ring binder as well as a 3-hole punch inside, and I thought that could help me keep organized more easily.  However, after looking more closely at the content, it doesn’t seem as helpful.  I’m considering exchanging it for one that is better suited to my wedding style and budget.

2.  I checked out my first wedding venue with my mom!  I found the experience a little overwhelming, but overall very helpful! It feels good to have gotten a tangible start to the process and feel like something has been completed.  Although I plan to continue looking at a few more options since this was only the first, I think that this particular venue is a real possibility.  It combines a classy feeling with the option to add some fun and personal touches.  In addition, the wedding coordinator is AMAZING, which I think will be an extremely helpful thing in the long run.  She seems to be on the same wavelength as I am when it comes to ideas, so that’s really going to come in handy if we choose this venue.  In addition, she spent nearly THREE hours with my mom and me, discussing options, ideas, decorating plans she had previously implemented, helping choose tentative color schemes, touring the facility, etc.  She was SO wonderful, that I could consider choosing the venue based on her alone.  In short, I feel MUCH better about the next steps in planning after checking out the first venue and meeting with the wedding coordinator.  Here are some lessons that I’ve taken from this experience:

  1. Choose a venue that has a vibe with which you connect.
  2. Look into the details, too, not just the overall look of the venue.  For example, this particular venue’s banquet rooms are names for Founding Fathers and other famous historical figures from the American Revolution, which I think is cool because it ties into our Washington, D.C. proposal!
  3. Make sure the wedding/event coordinator goes through the package information and pricing with you.  Find out where you can cut corners, what options can be customized, and what can be changed.  For example, if the package includes an open/hosted bar for the entire reception, but you only want to have it for the cocktail hour, find out if the venue can accomodate this preference and what change it will make with the package price.
  4. Ask about extra fees, taxes, and gratuity!
  5. Take a look at the bridal changing area and see if you like it.
  6. Check out the ceremony site, if there is one, even if you aren’t really planning to use it.  You never know what you might find!
  7. Choose a wedding coordinator who “gets” you!  If he or she doesn’t like the same ideas you do, it’s going to make things much more stressful and difficult.  If you LOVE every idea that he or she suggests or tells you they’ve done in the past, you’ve got a winner!

I’m sure I’ll have more to add to this list as time goes on, but these are a few things that I noticed during the appointment and thought would be important!

3.  I chose my dress!!!!!!  Sorry for all the exclamation points… but not really 🙂  My mom and I really went just to look at a bridal salon that a family friend recommended to see if we would be interested in scheduling an appointment.  But, it turned out that they weren’t that busy, so they had me try a couple things on.  The first dress was pretty, but just not quite my style.  But the second one… It’s perfect!  Obviously I can’t post a photo just yet, but I am so excited to have found a dress that I love and by such happy accident!  I cried, my mom cried, even the consultant cried!  I was a little reluctant to say “yes” right away, but once they had me completely try it on (it wasn’t actually available in-store in my size, so it took a little consultant magic) and they reminded me that it was on sale for nearly half off, I just couldn’t pass it up!  Let’s just say that the dress incorporates some of my favorite things in the world, and I can’t wait for MY dress to come in so I can try it on over winter break!


Okay, well, I think that just about covers it for now!  I hope that you have enjoyed this first installment, and please let me know if you have and questions, comments, or suggestions!


XOXO

5 Year Anniversary

This week, I was blessed to celebrate my fifth anniversary with my fabulous fiance!  I could not have found a more wonderful man to spend my life with, and I am sincerely grateful that we have been able to grow together as a couple and as individuals throughout the past five years.

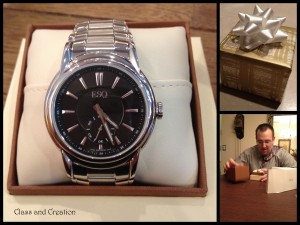
Since five years is a pretty significant milestone, I wanted to surprise my fiance with a gift that symbolizes both how extremely proud of him I am and my committment to him.  Last year, he surprised me with an engagement ring, and I haven’t been able to really spoil him yet, so I wanted to take this opportunity to do so!

When I saw this particular Movado watch, I knew it was perfect!  Since we are both in law school, I thought the ESQ was particularly fitting 🙂


I am hoping that this watch will be something that he can keep for a long time.  I wanted him to have something nice that symbolizes how proud ,of him I am.  I have been so impressed with the man he has become, especially within the last year as we have been engaged. going to law school, and living together.  I know that he is making his way into the professional world and wanted to give him something that belongs there with him!  Movado is an iconic and traditional brand of watch, and the ESQ line adds a little modernity to the designs.  I hope that he likes this watch as much as I do, though it seems he does so far!


I just wanted to share my excitement over this milestone and this gift with you all!  In case you’re wondering what he got me, I’m pleased to say that it came in a “little blue box!”  It’s so pretty, and I love it!


What’s your favorite anniversary present that you’ve received?


XOXO

Lauren Conrad Feature

Hey all!  I know I haven’t been posting as often as I should, but I have been very busy this summer!  (I know, it seems so backward!)


I am super excited that Lauren Conrad chose to feature lil’ ol’ me on her Gallery Spotlight: Our Fab Members post on 6/27/2012!!!

I feel like an absolute superstar for being featured in this way, and I truly could not have been recognized by someone I admire more!  (Sorry for all the exclamation points, but I’m obviously on cloud nine over this fantastic news)

Anyway, I hope that you all will take a moment to check out LC’s page at http://www.laurenconrad.com/ because it is what initially inspired me to start blogging.  I really enjoy the daily posts, and I find a number of them to be really helpful!  If you enjoy my blog at all, I am 100% sure that you will adore hers!

Thank you so much to all of you for your support, and thank you to Miss Conrad for this honor.  I couldn’t be happier!

XOXO

Friday Favorites

After comlpeting my first final of the semester, I’m happy to be thinking about something more fun!  Soon, I will have successfully completed my 1L year… I can’t wait!

Epic Study Fort! It may not be very practical, but it was sure fun and made studying suck less!

Favorite confidence booster: I have always been very shy and had difficulty in social situations. This was such a great feeling, and I totally kicked social anxiety's ass!

Favorite tailgate game: Corn Hole! You don't have to be sober or drunk to play this one, and its tons of fun! - ALSO, totally in love with Noelle's seersucker shorts!
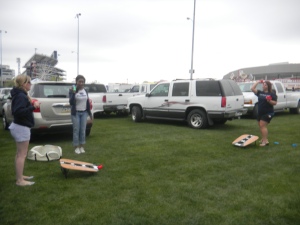
Speaking of seersucker... I LOVE just about anything seersucker! Click the photo to take you to an awesome blog post about it!

Favorite purchase this week: This Ann Taylor Loft tank! They were on sale for $15 and came in all sorts of adorable summery colors, but I fell head over heels for this amazing teal color. It's even more vibrant in person! I also found my favorite sweater in white and managed to get this tank and the cardigan for less than $30... Love me a Loft sale!

I made s'more of these s'more treats for the Blue and White tailgate last weekend! This time, I made three varieties: the original, some with peanutbutter added, and some with nutella instead of chocolate. (The ones in this picture are with peanutbutter!) Let me tell you, they were ALL delicious and were all a huge hit! I also really loved these pink and white sprinkles, via my most recent care package from my awesome mom!

I hope you enjoyed this week’s edition of Friday Favorites!  Please leave a comment if there’s anything you’d like to see in the next post!

XOXO

Bunny Cake

Since I was little, my mom has made a Bunny Cake for Easter most years.  A couple of years ago, she taught me how to make it.  This year, I couldn’t be home with my family for Easter.  My law school family, though, celebrated together.  It was fantastic!  We had a potluck dinner, and when they asked me what I’d like to bring, this was the first thing that came to mind.  I was so excited to share a tradition with others, especially when it meant bringing a part of home with me!

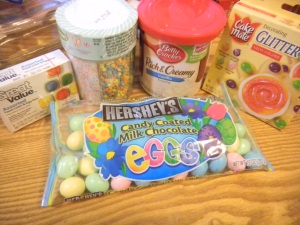
What you need:

  1. cake mix – I used Funfetti, but you can use whatever you want!
  2. frosting – it works best with plain vanilla
  3. coconut
  4. food coloring
  5. sprinkles
  6. candy for the eyes and nose
  7. either candy or colored frosting for the mouth and whiskers
  8. a really big flat pan or board to build the cake on – I recommend measuring first!

Here are some pictures of the process… I hope you enjoy!


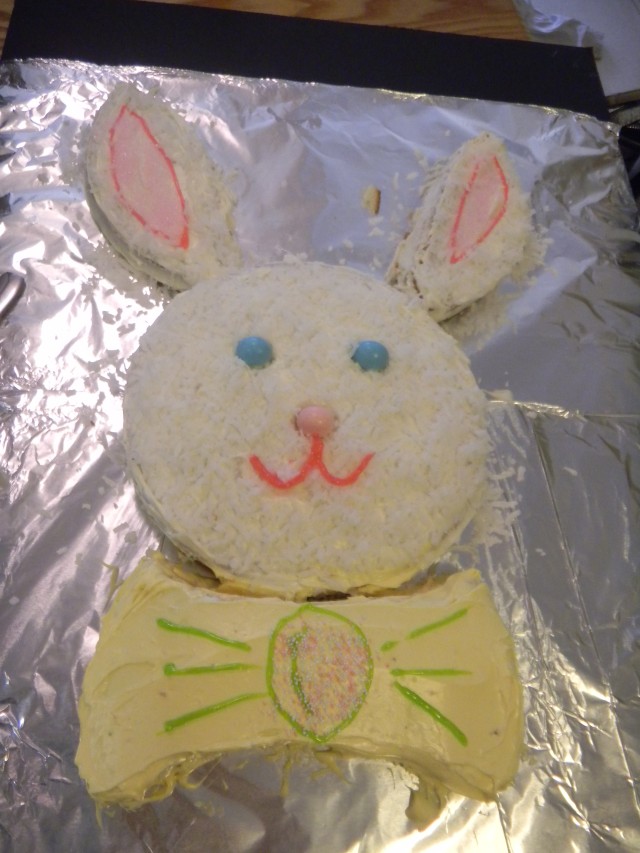
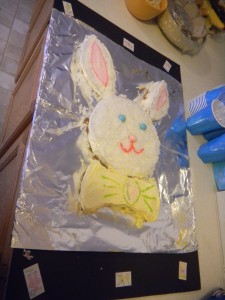
Two round cakes. Use one for the face, and cut the other into the ears and the bowtie.

This is what it looks like laid out

We decided on yellow for the bowtie!

Here it is after the frosting!

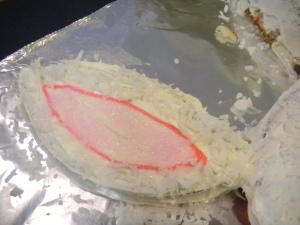
Ear: pink icing, pink sprinkles, and coconut

Here he is! ❤


We didn't have a pan or cutting board large enough, so we used the very thick kind of posterboard. I had some extra Easter stickers, so I used them to decorate the borders. I think it worked!

Friday Favorites

These Nine West black patent pumps are awesome! I bought them initially for mock trial, but they actually look perfect with jeans, too! They can easily be dressed up or down and are appropriate for officewear, too. And... they're actually not too uncomfortable! (Let's face it, all heels are at least a little uncomfortable!) Even better, I found them at Ross for only about $20!

IN LOVE with this Juicy Couture Wishes Pave Ring! You can read more about it in my earlier post!

Apparently, studying at Starbucks with a snack and a Java Chip Frappuccino Light with one pump of white mocha makes studying bearable!


Spring has sprung in Happy Valley! The sun has been shining and the weather has been beautiful... these flowers are soaking up the sunshine as much as I am!


Hope you’ve enjoyed this week’s Friday Favorites!  Please like or comment to let me know if you think I should keep doing them!

XOXO

P.S. Thanks to Instagram for helping my pictures turn out much prettier! 🙂